PowerPoint handouts help people to remember a presentation. But too often, presenters distribute handouts that are totally useless. Here’s how to change that.
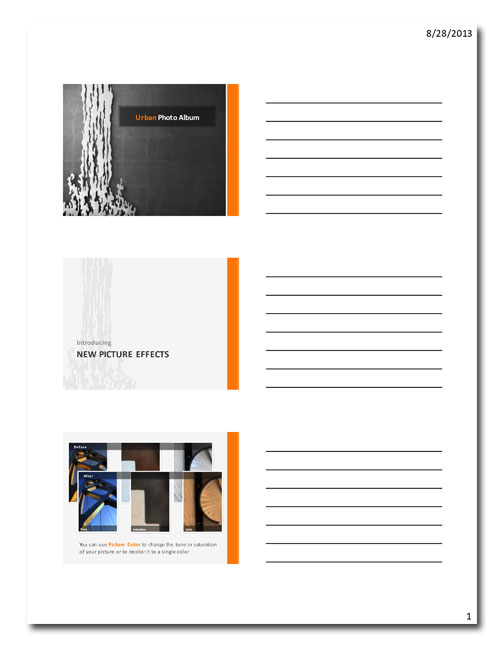
Traditionally, handouts were printed from the Handout View in PowerPoint and looked like this:
This layout allows the audience to write notes for each slide. The little slide icons help people to remember the presentation. But these kind of handouts pose a big problem for presenters.
The biggest problem with handouts
The biggest problem with handouts is that they’re often distributed before presentations. You might think that you’re doing your audience a favor by giving them something to write on, but you’re actually helping to distract them. People probably won’t be using your handouts to write one note at a time per slide. Instead, they’ll be flipping forward and backward, reading upcoming slides and referring to ones you’ve already shown. They’ll be critiquing your designs while you’re talking and they’ll be reading any slides with complicated tables, graphs, or dense blocks of text. In short, you’re setting yourself up to be ignored.
The second biggest problem with handouts
If you’re creating the kind of theatrical PowerPoint presentations that use lots of full-screen images, animations, videos, and transitions your deck could contain lots of slides. That makes for a giant handout, much of which will be useless for note-taking because some slides only appear for a few seconds or contain videos. Plus, slides with lots of animation don’t make good icons, since the animated elements look like they’re on top of each other. Sounds like a huge waste of paper to me.
Handouts as references, not notepaper
Because presentations are an experience, an intangible thing, they fade from memory over time. Handouts are a great way for people to remember what was said and can be referred to time and time again. We need to look at handouts differently and stop using the traditional format.
Believe it or not, people are still capable of taking notes during a presentation, whether it’s on paper or using a laptop. They don’t necessarily need a picture of your slide to remind them of what you were talking about. If they do, more often than not they’ll just snap one using their smartphones.
Making your handouts more awesome while increasing audience participation
Encourage the audience to take notes
This might be a novel thing for younger people or those who are used to receiving handouts as they enter the room. You should assure your audience that handouts will be provided that contain all sorts of information, including details about your presentation, ways to contact you, any websites you may have talked about, etc. Also mention that people might remember things better if they’re written in their own words.
During your presentation, choose one or more points that you want to emphasize, and ask your audience specifically to write it down. By stopping your presentation and asking people to take notes, you’ll get their attention and focus them on what you’re saying.
Change your handout format
The most effective way for you to control your message after your presentation is to create handouts that reinforce it. So make sure that your Speaker Notes are detailed and contain all of the information you want people to remember, because you’ll need them to create your handouts. Here’s how to do it:
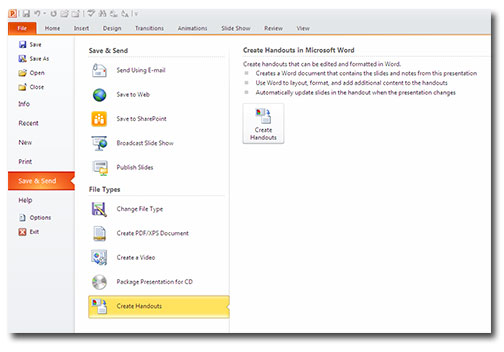
- Click on the File tab. Click on Save & Send, select “Create Handouts” (the last entry in the Save & Send column), then click on the Create Handouts button that appears in the next column.

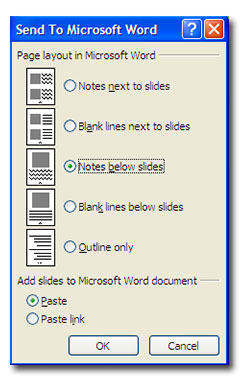
- In the next window that appears, select “Notes below slides” then click OK.

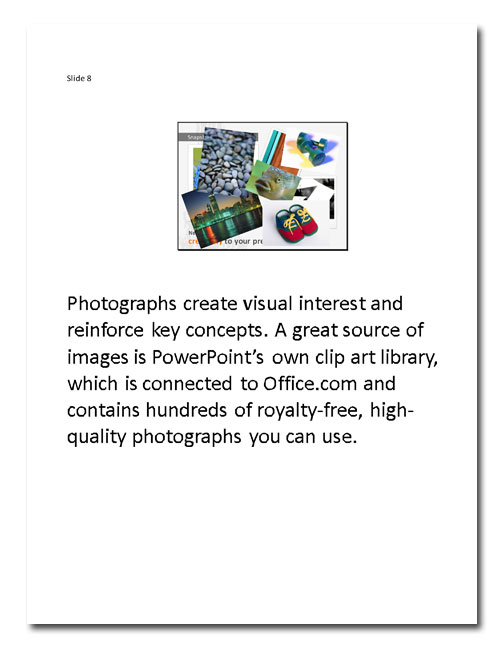
- Watch in amazement as Word automatically launches and formats your handouts! Here’s an example from the previous presentation:

The best part about creating handouts this way is that now you have a Word document that you can edit as you like. You can delete slides that work for the presentation but don’t work for print, edit images and text, add hyperlinks or QR codes, etc. Do whatever you think will help your audience remember your message and make it easy to connect with you!
When you’re done editing your handout, go to File > Save & Send > Create PDF/XPS Document to publish your handouts as a PDF file.
Distribute handouts after your presentation
After you wrap up your presentations, you should make your handouts available to your audience. But should you print them out or go paperless? You’ll need to determine which format is right for you. Here are a few pros and cons of each method.
Hard-copy handout
Bring a stack of hard-copy handouts to your presentation then hand them out at the end. On the plus side, your audience receives them right away and you get a good idea of how thoroughly they’ve been distributed. But they can be expensive to print and people might not take them, leaving you with a big pile of paper to get rid of.
Electronic handout
Before your presentation, post your handout PDFs on your own website or using a cloud service such as Dropbox. Include a link to the file on your final slide so that people can download your handout. There are several advantages to providing electronic handouts: They’re free! It’s possible to distribute a limitless number of handouts electronically. PDF files are searchable and can contain interactive elements. and electronic handouts are “green” because you aren’t printing something that may end up in a landfill. On the other hand the audience may not take the extra step of downloading your handouts.
Your Turn
In your experience, what has been the most effective handout you’ve distributed or received? Which do you prefer, hard-copy or electronic handouts?

